Showing posts with label Recipes. Show all posts

Tuesday, December 9

Happenings Around Here

Thanksgiving has come and gone {explain to me exactly how that happened?} and we are already full swing into many Christmas festivities.  But before I forget, I wanted to share these little tidbits.

♥  

My dad's employer is one of the very few left that still gifts a turkey to their employees for Thanksgiving.  My dad also likes to bless us, so he gave it to us.  We all went to my aunt's home and had a lovely Thanksgiving Day at her house, but I am in the camp that Thanksgiving just isn't the same if you don't have leftovers.  I cooked up the gifted turkey the Saturday after Thanksgiving (along with {from scratch} green bean casserole {FYI: once you go scratch, you never go back.  For reals.}, horseradish carrots, mashed potatoes and gravy and of course, fresh cranberry sauce) so we too, could have a weeks worth of meals.

Once all the trimmings leftovers were gone, of course we had lots of turkey still to be eaten.  So the family favorite White Enchiladas was on the menu. Can you say yum? 

And then. 

Ladies (and gentlemen as it may be), these are the new family fave for leftover turkey. 

Turkey Taquitos with a Spicy Cranberry Dipping Sauce

I was reading my favorite Food Network Magazine and Guy said these were his favorite to make with leftover turkey.  And funny enough, it isn't his recipe, but they are still oh so delicious!  I'll be honest, they are a pain to make if you don't have a deep fryer (we don't) but well worth it!!!  While casseroles that use up all the trimmings are great, they still taste like Thanksgiving dinner, and if you are like me, four or five days in you want. some. variety. of flavors!!!  Any Mexican inspired dishes are always a hit at our house, and these are a great option.
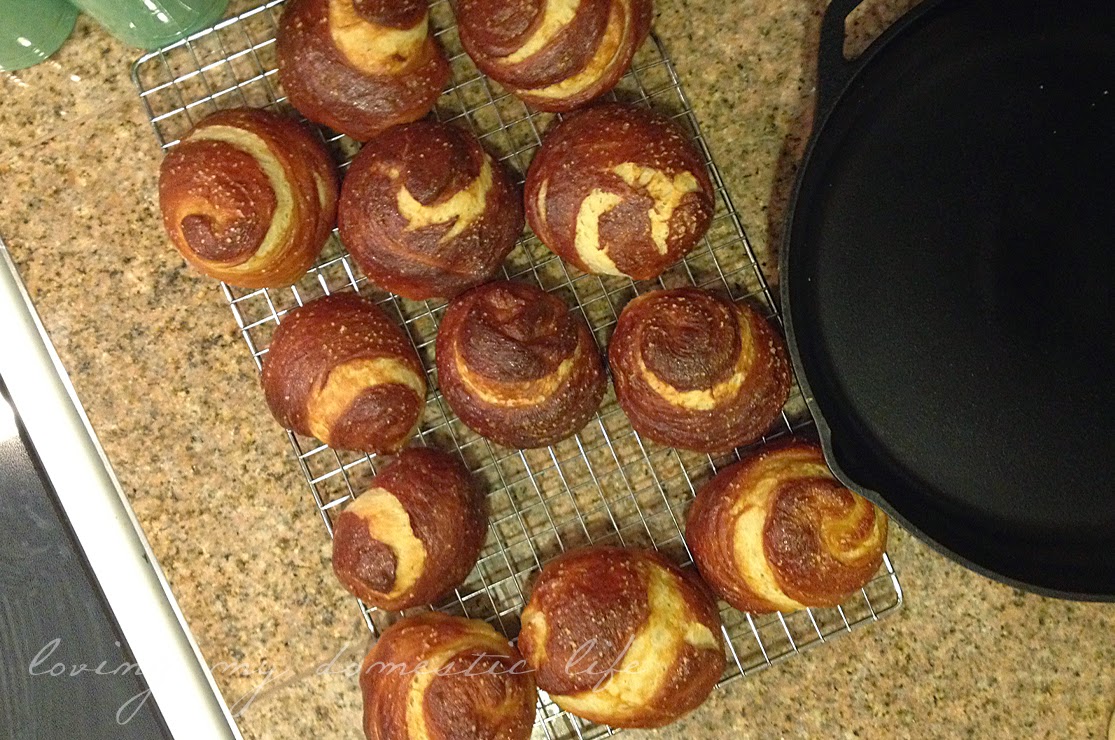

I also made these pretzel rolls and these schnitzle sandwiches recently.  Actually, it was about six weeks ago, but whatever.  The rolls tasted great (which I thought turned out looking pretty good too!) and the schnitzel sandwiches were divine. 

♥ 


We've all been passing around the sickies.  So that's fun.  But what's really the greatest is that I currently sound like (and have for about a week now) a fifty year old two-pack-a-day-smoker named Roxie.  I'm telling you, it's every bit as charming as it sounds. 

 ♥ 

About a month ago, our sweet boy was at the counter eating his lunch and he looked a little sad.  He was propping up his head on the counter with his crooked arm {I hope that word picture makes sense}.  I asked what was wrong and he said to me, "Me wish me had a truck like Daddy's" and sighed a sigh so big, you would have thought he had the weight of the world on his shoulders.


 ♥

A few weeks ago, I overheard the Peanut telling her Daddy about her day at school.  They have chapel on Fridays and she was telling him all about it:

"Sometimes when we are singing, people hold up their hands and close their eyes......I don't know why they close their eyes. But they hold up their hands 'cause it's like they are giving a high five to God."

Oh my gosh, I just about died laughing.  This girl is something else.  I feel like I fail her on so many different levels each and every day and she is just still as sweet and innocent as can be. 

I can't believe God chose me (!!!) to be her and my son's mama. 

To say I am humbled would be an understatement. 


Tuesday, September 16

{Fresh} Peaches & Cream Dessert


I realize this may be a little late in the season for some of you, and I apologize.  These last six weeks have been busy with potty training, swimming, school starting, you know.....LIFE.  Quite honestly, I took the pictures when I made this dessert the last time and then I got busy with back to school and her party and I just forgot.

If you still have access to some fresh peaches (or nectartines--I've made it with both and it is yum both ways!), you won't be dissapointed.  My family (immediate and extended) gave it rave reviews--which, let's face it, if they won't be honest with you, then who will?

It is perfect for the hot summer day when dessert is in order, but baking something is not.  Which is how this recipe came about--I searched the internet high and low and couldn't find something that suited my fancy because:

1.  I wanted to make a fresh peach dessert, because I had several sitting on my counter that needed to be used.  
2.  It was 90+ degrees all week and I SO was not turning on my oven.
3.  A hot dessert in 90+ degree heat does not sound appetizing.  AT ALL.

So, what's a girl to do?  Blend about five different recipes together until it suits her purposes, that's what. 


{Fresh} Peaches & Cream Dessert


Crust:

2 cups finely ground graham crackers (I used about 1 1/2 sleeves of graham crackers and used my food processor to grind them up)
1/3 cup of melted butter

Mix together graham crackers and melted butter until evenly coated.  Firmly press mixture into a 9x13 glass dish or pie plate (and as I was editing my photos, I realized that a pie plate would have made an even prettier presentation. Duh, Jackie!)

Filling:

Whipped Cream~

2 cups heavy whipping cream
2-3 tbsp real maple syrup (you can use powdered sugar to taste as well)
2 tsp vanilla extract
2 tsp unflavored gelatin
2 tbsp water

In a small bowl, mix together the water and gelatin.  Let sit for about five minutes.  This will allow the gelatin to "bloom."  In a separate mixing bowl, mix together the whipping cream, maple syrup or powder sugar, and vanilla extract until soft peaks start to form.  Stop mixing and test your gelatin.  It should have bloomed, but it will probably be pretty firm.  Microwave it at 5 second intervals until it softens and becomes liquid (this shouldn't take more than 5-10 seconds).  If it becomes hot, stir it until it cools to room temperature.  Start beating your cream again and when it is nearly finished, pour in the gelatin liquid while the beaters are beating the cream, so the gelatin becomes fully incorporated. 

Please know that you can substitute in a container of cool whip if blooming and whipping so isn't your style.  Just proceed with the next steps.  Just sayin.

Cream Cheese Mixture~

8 oz cream cheese, at room temperature
3-4 tbsp real maple syrup (again, you can use powdered sugar instead)
1 tsp vanilla extract

Cream together the cream cheese, syrup and vanilla extract until mixture is creamy and incorporated.  Once it is fully mixed, fold in the whipped cream mixture to the cream cheese mixture until combined.   Spread evenly over the refrigerated crust and refrigerate about 2 hours or until completely firm. 

Peach Layer:

4-5 peaches or nectarines

Pit and slice peaches or nectarines and arrange in layers on top of the cream cheese layer.  You may serve immediately or if you need to refriderate, I would suggest adding the lemon glaze on top.  It makes it look all pretty and glossy and the lemon helps the peaches to not brown and get all icky looking. 


Lemon Glaze:

1/4 cup sugar
1 1/2 tsp arrowroot powder or cornstarch
1/2 cup water
1 tbsp fresh lemon juice
zest of 1 lemon

Mix together in a small sauce pan over medium heat, stirring often.  Sugar will dissolve and mixture will became thick.  Once the mixture can coat the back of a spoon, remove from heat and let cool to room temperature.  Using a pastry brush or silicone brush, coat the peaches with the lemon glaze. 

Refrigerate until ready to serve. 

Serves 8-12. 


Tuesday, May 27

Thousand Island Dressing

Well, h*e*l*l just might have actually frozen over.  'Cause I'm posting a recipe here, folks.

We won't even mention just how long it's been since I've done that.  (It's been since November of 2011.)

This one is just too good not to give mention to, and I have my mama to thank.  She's pretty awesome like that. 

We have our family favorite homemade ranch dressing and it's awesome.  I seriously haven't bought salad dressing in a sweet forever.  Although I'm not nearly on the whole foods bandwagon as I was three years ago (but certainly should be!), I still don't buy salad dressing.

Like ever. 

I've heard it's one of the worst processed foods out there, with all the preservatives and junk that manufactures put in them.  I know for darn sure that my homemade salad dressing isn't good for like six months after I make it.  It's probably good for two weeks, tops.  Not that it ever lasts that long--because it's so much better.   

Anyhow, thousand island dressing.  Seriously NOT my favorite dressing out there.  I mean, if it was the only dressing available, I would eat it.  Begrudgingly.  I would never choose it from a restaurant  when eating out.  It's simply is not my go to dressing. 

Until now--at least when eating at home!

My mama added several things to give this some kick, including horseradish, Sriracha hot sauce and cayenne pepper. And it is yum.

It definitely gets 10 stars in my book! 


1,000 Island Salad Dressing with a Little Something Extra 


3/4 cup mayonaise
1/3 cup to 1/2 cup of ketchup
2 Tbsp dijon mustard
1 Tbsp prepared horseradish
2 Tbsp Worsteshire sauce
2 Tbsp pickle relish
2-3 tsp Sriracha hot sauce (I don't like things super spicy, but I seriously had to add a fair amount to give this some noticeable kick)
1/2 tsp black pepper
1/4 tsp cayenne pepper
Salt, to taste


Mix ingredients together thoroughly.  All of these ingredients are approximate.....that's how I (and my mom) both roll in the kitchen!.  Feel free to add additional of any of the above ingredients to suit your tastes! 

Refrigerate until ready to serve. 


This recipe is linked to:

Flour Me with Love's Mix it Up Monday
Premeditated Leftovers Hearth and Soul Hop


Monday, December 26

Best Breakfast Recipe of 2011: Fresh Cherry Scones with a Sweet Almond Glaze

 ♥ ♥ ♥ ♥ ♥

 Countdown to 2011 with Finding Joy in My Kitchen

I am linking this recipe up to Finding Joy in My Kitchen's Countdown to 2012: Best Breakfast Recipes.  This is by far my favorite breakfast creation I came up with this year!  Too bad we already ate all the cherries in our freezer.  Otherwise, I would be making them again right now!  

 ♥ ♥ ♥ ♥ ♥

It had been no more than a week after we finished up the cherries that we Hubs picked 4th of July weekend, that our sweet landlord called and asked if we wanted some cherries from her brother's orchard.  Of course I would never turn down fresh picked cherries, so I jumped at the offer.  But then as I was filling up a big bowl of cherries to take, I remembered that we are going out of town, so I better cool it with taking so many because there is no way we are going to finish them up before we leave.


Enter getting creative with meals to eat some more cherries.  After Hubs ate his first scone, he asked if he could have another one.  I said of course, and as he was walking away, he says something about selling these.  What a nice Hubs, huh?  Oh and for the record, no, he doesn't normally ask permission for seconds, but he knew I hadn't taken pictures yet for the blog, so he wasn't sure what was "allowed."  Isn't he a good blogger husband? 


Fresh Cherry Scones

2 cups flour (I used fresh ground soft white wheat, but all purpose would work fine too)
3 1/2 Tbsp sugar
2 1/2 tsp baking powder
1/2 tsp salt
1/3 cup cold butter, cut into cubes
1 egg, beaten
1 1/4 cup fresh cherries; stemmed, pitted, chopped (should be 1 1/4 cups after stemming, pitting, and chopping)
4 to 6 Tbsp milk

Preheat oven to 400 degrees.

In a large bowl, mix together dry ingredients and cut butter into dry mixture using a pastry cutter or two knives.  Mixture should resemble coarse crumbs.  Add in egg, fresh cherries, and about 3 tablespoons of milk (to start) and fold together.  Fold until just moistened, adding more milk if necessary.

On a lightly floured surface, pat dough into a disk, about 1 inch thick.  You will want to flour the top of the dough as well, as it will be sticky.  Cut the disk like a pie into even sized scones.  I was able to get six generous sized scones.

Bake for approximately 15 minutes or until toothpick inserted comes out clean.  Let cool completely prior to glazing.

Sweet Almond Glaze

1/2 cup powdered sugar
1-2 Tbsp milk
1 tsp vanilla
1/2 tsp almond extract

Mix together ingredients until smooth.  If consistency is too thick, add a shade more milk.  If consistency is too thin, add a dash more powdered sugar.  Wing it like I do! ;)  Drizzle over cooled scones. 


Monday, December 19

Countdown to 2012

For the last two years, SnoWhite over at Finding Joy in My Kitchen has a hosted a wonderful year-end blog carnival for bloggers to link up their best recipes from the year.  And guess what, folks?  She's hosting it again as we head into the new year!

 Countdown to 2011 with Finding Joy in My Kitchen

I am honored to be joining her in the event, so please mark it on your calendars to make sure and stop by to find some great new recipes for the new year!  Starting next Monday (can you believe it?!?!?) the schedule will be:

December 26th – Best Breakfast Recipes of 2011
December 27th – Best Bread Recipes of 2011
December 28th – Best Soups & Stew Recipes of 2011
December 29th – Best Main Dish Recipes of 2011
December 30th – Best Crockpot Recipes of 2011
December 31st – Best Dessert Recipes of 2011


And don't be shy, because you are invited too!  Look back through your recipes for the year and pick out some of your favorites.  You can participate all of the days or in whichever categories you choose!  Simply visit Finding Joy in My Kitchen on the corresponding day to link up your favorite recipes.

Will you consider joining us?   


Monday, November 7

Chili Cheese Dip

This isn't that kind of chili cheese dip.  You know the ooey gooey processed cheese (chemicals) and a can of chili dip.  But you know?   That other stuff is good.  No redeeming nutritional value whatsoever, but good.  This is all just to clarify that I have eaten junk (and liked it!) and lived to tell about it.  ;)

Anyhow, I set out to make a recipe the other night and realized I didn't have all the ingredients, so I just came up with my own version.  The verdict?  Amazing.

Like so amazing I would have ate it all for dinner and not left any for Hubs when he got home amazing.  But I was a good little wifey and I did leave some for Hubs.

Begrudgingly.


Chili Cheese Dip

8 oz. cream cheese, softened

1/2 cup mayo
2 cans (4 oz. each) diced green chilies
1 cup Monterrey jack cheese
1/2 cup bread crumbs (see my tip here)
Diced jalapenos for topping, if you like the extra heat (Peanut and I don't, but Hubs does)
Salt and Pepper, to taste

Preheat oven to 400 degrees.

Mix together softened cream cheese and mayo until well blended.  Add in chilies and Monterrey cheese and mix evenly.  Place in an oven proof bowl and top with bread crumbs.  Heat until warm and starting to bubble and bread crumbs are browned on top, about 15 to 20 minutes.  Top with additional jalapenos if desired.

Serve with veggies, chips, crackers or bread slices. 


♥ ♥ ♥ ♥ ♥

This recipe is linked to:

Beauty and Bedlam's Tasty Tuesday
Blessed With Grace Tempt My Tummy Tuesday
Designs By Gollum Foodie Friday
Grocery Cart Challenge Recipe Swap
Friday Potluck at EKat's Kitchen
Hearth 'n Soul Recipe Swap at Premeditated Leftovers

Miz Helen's Country Cottage Full Plate Thursday  


Monday, October 31

Chipotle Turkey Chili with Apples and Cheddar

When I came across this recipe in my Rachael Ray magazine, I thought it sounded delish and knew I wanted to try it.  It was great.  And it's a great variation on your standard chili, so if you like to mix it up, this might be a great one to try.


Chipotle Turkey Chili with Apples and Cheddar ~ adapted slightly from Rachael Ray


2 tablespoons extra virgin olive oil (EVOO)
3/4 pound ground turkey
1 Tbsp pureed chipotles (click here for what to do with the rest of the can)
1 tablespoon ground coriander
1 tablespoon ground cumin
1 tablespoon smoked sweet paprika
1 red onion, chopped
2 large cloves garlic, chopped
2 cans red beans, drained and rinsed
2 apples, divided
Juice of 1/2 lemon
2 bay leaves
3 tablespoon tomato paste (click here for what to do with the rest of the can)
2 cups chicken stock
1 cup apple cider
Shredded extra-sharp white cheddar cheese, pepitas (toasted pumpkin seeds) and tortilla chips, for serving

In a large dutch oven, heat EVOO and brown ground turkey.  Using a potato masher works really well to break up the meat.  Stir in chipotles, coriander, cumin, paprika, onion and garlic.  Cook until onion is softened.  Add in red beans, bay leaves, tomato paste, chicken stock, and apple cider and stir to combine. 

Now this is where it would have been helpful to read the directions thoroughly before charging ahead and making the recipe how I thought it should go together.  Rachael says to peel, core, and dice one of the apples and add it to the chili and reserve the other (just coring and chopping) to dress with lemon juice and serve as a garnish.  Pretty, right?  I didn't do that.  I peeled, cored, and diced both apples and put them in the soup.  Wasn't nearly as nice for presentation, but it still tasted good.  

After apple(s) is added, simmer until flavors meld, stirring occasionally about 20-30 minutes.

Serve with sharp cheddar cheese, pepitas, tortilla chips and chopped apples for serving.  


♥ ♥ ♥ ♥ ♥

This recipe is linked to:

Beauty and Bedlam's Tasty Tuesday
Blessed With Grace Tempt My Tummy Tuesday
Designs By Gollum Foodie Friday
Grocery Cart Challenge Recipe Swap
Friday Potluck at EKat's Kitchen
Hearth 'n Soul Recipe Swap at Premeditated Leftovers

Miz Helen's Country Cottage Full Plate Thursday  


Monday, October 24

Warm Blue Cheese Bacon Dip

Yes, I have been on a blue cheese kick.

I had some leftover bacon (I know) the other day and decided to make some of this dip.  I haven't had it in awhile and it was so GOOD.   It is so easy to make and such a great mixture of flavors.  It's perfect for entertaining too, as it can be made ahead.  I made this for my parents 30th anniversary party we threw for them several (!) years ago and it was a hit! 


Warm Blue Cheese Bacon Dip

8 oz. cream cheese
1/4 cup cream (you can use whole milk, half and half, whatever you have on hand)
2 cloves garlic, minced
7-8 strips cooked bacon, chopped
1 Tbsp green onions (green parts only, minced--not just sliced)
1/2 cup blue cheese crumbles

2 Tbsp chopped, smoked almonds (mine weren't smoked, just dry roasted)

Beat cream cheese to soften and mix in cream/milk.  Add in garlic, bacon, green onions, and blue cheese.  Mix evenly to combine and place in oven proof dish.  If making ahead, refrigerate.  Pull out of refrigerator 30 minutes prior to baking.  Heat in 350 degree oven until heated through, about 30 minutes.  Top with almonds and serve warm, but not piping hot.  Serve with celery sticks or crackers. 

♥ ♥ ♥ ♥ ♥

This recipe is linked to:

Beauty and Bedlam's Tasty Tuesday
Blessed With Grace Tempt My Tummy Tuesday
Designs By Gollum Foodie Friday
Grocery Cart Challenge Recipe Swap
Friday Potluck at EKat's Kitchen
Hearth 'n Soul Recipe Swap at Premeditated Leftovers

Miz Helen's Country Cottage Full Plate Thursday  


Monday, October 17

Swedish Meatballs ~ As Good As Ikea's?

These are a knock off of the famous Ikea Swedish Meatballs.  To be honest, I've never actually had the Ikea meatballs (getting food at a furnishings store just seems wrong to me), but I do like Swedish meatballs in general and have never found a recipe I was entirely thrilled with.  Until now.  These are very, very good.  In fact, this is a good reminder, as I need to make these again!

The only thing I would change in the future is that I would make more sauce.  The recipe only  accounts for sauce to be served over the meatballs, but I served ours with pasta noodles, so I will definitely double that for next time.


Swedish Meatballs ~ adapted from the Food Network magazine

For the meatballs:

1 cup breadcrumbs
2 tablespoons butter
1/3 cup minced white onion (I used yellow)
2 cloves garlic, minced
1/8 teaspoon ground allspice
Kosher salt and freshly ground pepper
1/2 cup milk
1 teaspoon Worcestershire sauce
3/4 pound lean ground beef
1/2 pound lean ground pork
2 large eggs, beaten
Olive oil, for brushing

For the gravy (I would double the below amounts if serving with noodles):

2 tablespoons butter
2 tablespoons all-purpose flour
1 1/2 cups low-sodium beef broth
1 teaspoon Worcestershire sauce
1/4 cup heavy cream Kosher salt and freshly ground black pepper
2 tablespoons chopped fresh parsley (optional....didn't have this when I made it, but I so wish I did! I LOVE fresh parsley)
Lingonberry jam, for serving (optional.....um, yeah, a jar of this was around $9......not in my house!)

For the meatballs:

Preheat oven to 400 degrees.

Add the breadcrumbs in a large bowl. In a skillet over medium heat, melt butter and saute onion and garlic until softened. Stir in allspice, salt, and pepper. Add to bread crumb mixture along with milk and Worcestershire sauce and mix to combine. Add ground beef and pork and mix well--hands are a great tool!

Brush cookie sheet with coconut oil and roll meat in 1 inch balls and place on baking sheet. Bake in preheated oven until meatballs are cooked through, about 20 minutes.

For the gravy:

Melt butter in a large skillet over medium heat. Add in flour and whisk to combine and let cook for a minute or two. Add in beef broth,Worcestershire sauce, and heavy cream and mix well to combine. Mixture will thicken as it heats through. Make sure to stir occasionally. Season with salt and pepper to taste. Serve over meatballs (and noodles) and garnish with fresh parsley and Lingonberry jam, if desired.


♥ ♥ ♥ ♥ ♥

This recipe is linked to:

Beauty and Bedlam's Tasty Tuesday
Blessed With Grace Tempt My Tummy Tuesday
Designs By Gollum Foodie Friday
Grocery Cart Challenge Recipe Swap
Friday Potluck at EKat's Kitchen
Hearth 'n Soul Recipe Swap at Premeditated Leftovers

Miz Helen's Country Cottage Full Plate Thursday  


Monday, October 3

BLTs with a Blue Cheese Spread

I seriously thought a BLT couldn't be improved upon.  It's pretty much perfection in a sandwich.  Or so I thought.  As I was flipping through the pages of my newest Food Network Magazine, I saw this and thought, well, I MUST try that.  

Bacon and blue cheese are like Fred and Ginger or salt and pepper or Diet Coke and M&Ms.  Wait, you don't do that?   Oh that's right, that last one is my dirty little secret.  Well, it's certainly no secret that bacon and blue cheese are a match made in heaven and this sandwich....it just might be the yummiest sandwich this side of heaven. 


BLT Sandwich with a Blue Cheese Spread ~ adapted from The Food Network Magazine

Blue Cheese Spread

1/4 cup mayonaisse
1/4 cup sour cream
1/4 cup + blue cheese crumbles
2 Tbsp hot sauce (like Frank's)
1 small clove garlic, minced
Freshly ground black pepper (I used lots!)

Mix ingredients together until well mixed.  Add additional blue cheese crumbles or hot sauce if desired.   

Sandwiches

Bread (I totally cheated and used store bought bread--Dave's Killer Bread--have you tried this?  It's so killer, but (unfortunately!) SO pricey)
Bacon strips, cooked until crispy, but not burnt
Tomatoes, sliced (garden fresh put this over the top!)
Romaine lettuce

Toast bread slices and let cool just a bit.  Slather blue cheese spread on a toasted bread slice and layer bacon, lettuce, and tomato.  Top with remaining bread slice.  Slice in half and serve. 


♥ ♥ ♥ ♥ ♥

This recipe is linked to:

Beauty and Bedlam's Tasty Tuesday
Blessed With Grace Tempt My Tummy Tuesday
Designs By Gollum Foodie Friday
Grocery Cart Challenge Recipe Swap
Friday Potluck at EKat's Kitchen
Hearth 'n Soul Recipe Swap at Premeditated Leftovers

Miz Helen's Country Cottage Full Plate Thursday  


Monday, September 26

Sesame Pecan Chicken

This one was so good!  I was gifted a subscription to the Food Network magazine (which I LOVE!) and this was yet another one of their amazing recipes.  I will definitely be making this one again. 


Sesame-Pecan Chicken Strips ~ slightly adapted from the Food Network Magazine

2 large eggs
1 cup panko breadcrumbs
1/2 cup finely chopped pecans
1/4 cup sesame seeds
1 teaspoon paprika
Coconut oil (mine is expellar pressed so it doesn't have the coconut flavor, although with this, it might not be bad)
1 1/4 pounds skinless, boneless chicken breasts, cut into 1-inch-wide strips

In a cast iron skillet over medium to high heat, heat enough coconut oil so oil is about 1/4 inch deep.  This will vary depending on skillet size.  You know your oil is hot enough when you stick a wooden spoon in the oil and little bubbles roll off the spoon.  That's a Rachael Ray tip. 

Beat eggs in bowl, set aside.

In a flat dish, mix together panko, pecans, sesame seeds, paprika and a bit of salt.  Dip chicken strips in egg, fully coating each piece and then dredge the strips in the breadcrumb mixture, pressing mixture on chicken to help it adhere.  Cook chicken until golden brown or until thermometer reads 165 degrees--about three minutes per side. 

Drain on paper towels and serve with Lemon Parsley Rice for a complete meal. 

♥ ♥ ♥ ♥ ♥

This recipe is linked to:

Beauty and Bedlam's Tasty Tuesday
Blessed With Grace Tempt My Tummy Tuesday
Designs By Gollum Foodie Friday
Grocery Cart Challenge Recipe Swap
Friday Potluck at EKat's Kitchen
Hearth 'n Soul Recipe Swap at Premeditated Leftovers

Miz Helen's Country Cottage Full Plate Thursday  


Saturday, September 24

Tried It & Loved It: Vanilla Bean Cupcakes


These are a lovely little number.  Most of you would probably roll your eyes if I told you the reason I chose this recipe for Peanut's birthday "cake".  There were a couple of reasons actually.  The first being that I got those adorable red bandana cupcake liners (here) and when you bake darker colored cakes like chocolate, the print typically won't show through--at least not very well.  (Yes, I realize I didn't even end up baking them in the red liners, which had I to do again, I would have nixed the white liners and baked in the printed ones.  I didn't realize the humidity that day would droop the liners as we set them in the cute ones  But I digress).  The second reason being (the one for the eye rolling) that I wanted something yummy that didn't involve any artificial colors.  I completely realize that having those dyes once and a while won't kill you--at least that we know of.  Ha, ha.  But I also figure if I can find something that tastes great and doesn't have all that junk, then why not?

They were a hit too.  Several people told me how good they were....hopefully they weren't just being nice!  According to my sister-in-law niece (see comments below) they were "THE BEST CUPCAKES IN THE WHOLE UNIVERSE."

Wow.

That's high praise!

But I really can't take too much credit, as the recipe isn't mine.  I do think they turned out cute.....and that I can take credit for.


Vanilla Bean Cupcakes ~ from My Baking Addiction

for the cupcakes
2 1/4 cups cake flour (I used good ol' all purpose)
1 tablespoon baking powder
1/2 teaspoon kosher salt
1 1/4 cups whole milk, room temperature
4 large egg whites, room temperature
1 stick (8 tablespoons) unsalted butter, at room temperature
1 1/2 cups sugar
seeds scraped from one vanilla bean
2 teaspoons pure vanilla extract

for the buttercream
3 sticks unsalted butter, softened
seeds scraped from one vanilla bean
2 teaspoons clear vanilla extract (clear vanilla isn't "real" vanilla, so yes, I used the dark stuff)
1 ½ pounds (24 ounces) confectioners’ sugar, sifted
4-6 tablespoons heavy cream or milk

Preheat oven to 350 degrees.  Line muffin pan with liners or spray bottoms of cups.  Set aside. 

For the cupcakes, sift together the flour, baking powder, and salt and set aside.  In a stand mixer using the paddle attachment, cream together butter and sugar.  Add in the egg whites and mix together thoroughly.  Add in milk, vanilla seeds, and vanilla extract and mix well.  Add in flour mixture one cup at a time until thoroughly incorporated.  Continue mixing for two minutes to insure batter is aerated. 

Fill muffin cups 2/3 full and bake for 18-24 minutes or until toothpick inserted comes out clean.  Mine were closer to the shorter end, probably around 19-20 minutes.....of course this will vary by your oven.  Cool on a wire rack.

For the buttercream, cream together butter and vanilla seeds until fluffy.  Add in powdered sugar and mix until blended.  Add in vanilla and and about half the milk and mix thoroughly.  Add in additional milk until desired consistency is reached.  Beat at high speed until light and fluffy.  Frost completely cooled cupcakes. 


Monday, September 19

Spicy Sausage and Roasted Eggplant Pasta

I came across a recipe in a magazine my sister-in-law gifted to me but of course I can never leave well enough alone.  By the time I was done with making the recipe, it was pretty much my own.  Plus, eggplants were on sale at the grocery store a few weeks back and it was the perfect opportunity to come up with my own version.  Can I just pat myself on the back?


'Cause it was amazing.

That probably sounds really conceited.

But it was.  Really.

Give it a whirl.  You'll be glad you did.  

OH!  By the way.....just a little PSA for you all.  The recipe called for ricotta (low fat of course, which we all know I don't do) so I picked up some organic ricotta.  Not because it was organic (that part was a bonus), but because the price was right and it was whole fat ricotta rather than the low fat/no fat traditional brands.   Ohmylanta, was it GOOD.  I am usually indifferent to ricotta, but this stuff......seriously??!?!?!?!  This is what I've been missing?  Folks, once you go whole fat, you'll never go back.  For reals.  

Notice the garden fresh tomatoes and cucumber on the salad.  Sigh.....I miss summer already!

Spicy Sausage and Roasted Eggplant Pasta

Extra Virgin Olive Oil
1 large eggplant, cut up in 1/2 inch cubes
Salt and Pepper
8 oz. small piece pasta (I used whole wheat penne)
1/2 cup onion, diced
8 oz. spicy sausage  (I use the habanero chicken sausage from Costco), cubed
1/2 tsp oregano
2 cloves garlic, minced
1 can diced tomatoes
2 Tbsp capers
2 Tbsp red wine
1 Tbsp vinegar (I used rice)
1/3 cup parsley, minced
Salt
Ricotta cheese

Preheat oven to 400 degrees.  Place cubed eggplant on a baking sheet (I used my baking stone).  Drizzle with a generous amount of olive oil and season with salt and pepper.  Roast in preheated oven for about 25 minutes, stirring eggplant about half way through the cooking.  Eggplant will be tender and smaller in size when finished.  Remove from oven and set aside.

Bring a large pot of water to a rolling boil and cook pasta according to package directions.

While pasta and eggplant are cooking, in a separate skillet, over high heat add onion and sausage with several drizzles of olive oil and cook until sausage is starting to brown and onions are translucent.  (My sausage comes fully cooked, so I was just heating it through.)  Reduce heat to medium and add oregano, garlic, tomatoes, capers, red wine, vinegar, and eggplant.  Allow sauce to heat through and reduce slightly.  Stir in pasta and parsley, reserving about 2 tablespoons parsley for serving.

Serve pasta with a generous scoop (about 2 tablespoons) of ricotta on top and sprinkle with remaining parsley.


♥ ♥ ♥ ♥ ♥

This recipe is linked to:

Beauty and Bedlam's Tasty Tuesday
Blessed With Grace Tempt My Tummy Tuesday
Designs By Gollum Foodie Friday
Grocery Cart Challenge Recipe Swap
Friday Potluck at EKat's Kitchen
Hearth 'n Soul Recipe Swap at Premeditated Leftovers

La Bella Vita's Fresh Clean and Pure Friday 
Miz Helen's Country Cottage Full Plate Thursday  


Saturday, September 17

Tried It & Loved It: No Yeast Cinnamon Rolls


On our trip to visit the Hubs' parents last month, one of the mornings my mother-in-law made a version of these rolls.  Her recipe is one that has actually been handed down through the family--it's one of those recipes I've been meaning to get from her.  I just haven't gotten around to it yet.  Kinda' like those muffins from awhile back.

In blog hopping a few weeks ago, I came across this recipe for a quick bread cinnamon roll and I knew I needed to try it.  I big fluffy pink hearts love cinnamon rolls, but I don't make them too often because a) they are a yeast bread and that takes time in the morning--which I don't have when I have a hungry Peanut--OR you have to plan ahead, and I don't do that too often when it comes to breakfast and b) cinnamon rolls have tons of sugar and I try to be somewhat conscious of that.  Not to say we never have sugar, but I do try it watch it somewhat.  Ahem.

Anywho, I thought a No Yeast Cinnamon Roll was a perfect recipe to try.  These were really good, although they are different than their traditional yeast counterpart.  Not bad, just different.  All in all a great option if you have a hankering for cinnamon rolls but you don't have several hours or you simply want them sooner than later.  ;) 


No Yeast Cinnamon Rolls ~ adapted from Abby at Cats and Casseroles

for the filling:
3/4 c. packed dark brown sugar (I used sucanat--next time I will probably cut back on it a little, just because sucanat is MUCH sweeter.  I will also probably grind it up a little finer in the food processor first.)
2 tsp ground cinnamon
1/8 tsp salt
4  Tbsp unsalted butter, melted

for the dough:
2 1/2 c. (or more) flour  (I ended up using a nearly a whole additional cup of flour to get a dough consistency--2 1/2 cups soft white wheat and 1 cup all purpose)
1 Tbsp sugar
1 1/4 tsp baking powder
1/2 tsp baking soda
1/2 tsp salt
1 1/4 cups buttermilk
6 Tbsp butter, melted


Preheat oven to 425 degrees.  Spray a round baking pan or 8 x 8 glass dish with cooking spray or butter sides and bottom and set aside.  

For the filling, mix the dark brown sugar/sucanat, cinnamon, and salt in a small bowl.  Set aside. 

In a large mixing bowl, sift together dry ingredients and add in buttermilk and melted butter.  Mix until a soft dough is created.  I would start with the 2 1/2 cups flour and add more as necessary--with just the 2 1/2 cups flour, mine was like a pancake batter, so I definitely needed to add additional flour!  Once a soft dough is created, turn dough out onto a floured surface and kneed several times.  Wrap dough in plastic wrap and let rest for about 30 minutes in the fridge. 

Once dough has chilled/rested, roll out on a floured surface in about a 12x10 rectangle.  Spread melted butter evenly over the dough and sprinkle the filling over the butter.  Roll up dough and seal edges by pinching dough together.  Slice in 2-3 inch slices (I got eight) and place in prepared pan.  Bake at 425 degrees for about 20 minutes.  Remove rolls from oven when tops of rolls are golden.  Cool for about 10 minutes prior to icing.    

For the icing, please click here for Abby's recipe.  I didn't have the ingredients on hand for hers so I went with a twist on The Pioneer Woman's. 

for the icing:
1 cup powdered sugar
2-3 Tbsp hot black coffee
1/4 tsp vanilla

Whisk powdered sugar, coffee, and vanilla together.  Drizzle over warm (not piping hot!) cinnamon rolls and serve immediately. 


Monday, September 12

Tuna Pasta Nicoise

This was the meal of THAT night.  But please, please don't let that deter you.  It was really good despite the fact that the evening didn't start out so well.  Some might find the combination of ingredients really strange (I did at first too!).  However at the very same time, I found the list of ingredients intriguing as well, and you know?  It really does work.


Hot (or Cold) Niçoise-Style Tuna Pasta ~ adapted from the wonderful Rachael Ray

2 small red potatoes
4 large eggs
Salt
1 pound short-cut pasta, such as shells, penne or farfalle (bowties) (I actually ended up using whole wheat egg noodles)
About 1/4 cup extra virgin olive oil (EVOO)
1 pint grape tomatoes (I used cherry from the garden)
1/2 cup dry white wine (I used chicken stock, but the wine would be wonderful)

1/4 cup Niçoise olives, chopped (I could not find Niçoise olives anywhere, so I used Kalamatas)
1/2 tsp red chili sauce (like Sriracha, more to taste if you're like the Hubs)
2 Tbsp onion, minced
2-3 large cloves garlic, finely chopped
1 jar or can tuna in water or oil (12 ounces), drained and flaked
A handful of flat leaf parsley, chopped
A small handful of fresh basil leaves, torn


Place the potatoes and eggs in a medium sized pot with enough water to cover the eggs by at least two inches.  Bring to a rolling boil and boil for two minutes.  Turn off heat and cover tightly.  Let stand for fifteen minutes.  (This COMPLETELY goes against the way my mom taught me to make hard boiled eggs.....but you know what?  It really does make a perfect hard boiled egg.  I was surprised too, Mom!)   

Remove the eggs (leave the potatoes in the water) and peel eggs under cold water.  Cut into small cubes or roughly chop.  Remove the potatoes and dice. Bring a large a pot of water to a rolling boil and cook pasta according to package instructions.  Reserve 1/2 cup starchy cooking water prior to draining pasta.   

While the pasta is cooking, over medium heat, in a large saute pan, heat olive oil.  Add the tomatoes, wine (or stock), olives, chili sauce, onion, and garlic.  Cover the pan and increase heat to medium high.  Cook and uncover the pan when the tomatoes start to crack. This will take about 10 minutes.  Lightly crush tomatoes with a wooden spoon.....whoops!  I didn't crush when I made this!  Make sure to crush!  Stir in tuna, parsley, and basil.  Add in starchy pasta water. 

Add the pasta to the sauce and toss.  Stir in eggs and potatoes and serve. 


♥ ♥ ♥ ♥ ♥

This recipe is linked to:

Beauty and Bedlam's Tasty Tuesday
Blessed With Grace Tempt My Tummy Tuesday
Designs By Gollum Foodie Friday
Grocery Cart Challenge Recipe Swap
Friday Potluck at EKat's Kitchen
Hearth 'n Soul Recipe Swap at Premeditated Leftovers

La Bella Vita's Fresh Clean and Pure Friday 
Miz Helen's Country Cottage Full Plate Thursday  


Saturday, September 10

Tried It & Loved It: Vanilla Biscotti


I have had biscotti on my list of things to bake for a LONG time.  Like over a year ago long time.  I know.  I remember making some when I still lived with my parents, and I loved it.  I wanted to try my hand at it again and I finally got around to it.

A few weeks ago I sat down and found a recipe and made this wonderful biscotti.  I can't wait to make some more!  Next time, I plan on adding in some fun little yummies, like almonds or dried cranberries.....or maybe even both.  I so would have this time, but I didn't have any on hand, so vanilla it was.  It was still so tasty.  Crumbly and buttery just like it should be.  A great accompaniment to my coffee.  Need I say more? 


Vanilla Biscotti ~ from King Arthur Flour

6 tablespoons butter
2/3 cup sugar (I did use sucanat, which is why the uneven color to my biscotti)
1/4 teaspoon salt
1 teaspoon vanilla extract
1 1/2 teaspoons baking powder
2 large eggs
2 cups unbleached all purpose flour (I did.....can you believe it?)

Preheat oven to 350 degrees.  Lightly grease a baking sheet for biscotti.  Set aside.

In a stand mixer, using paddle attachment, beat butter, sugar, salt, vanilla, and baking powder until mixture is evenly combined.   Add in eggs; mix until creamy.  Add in flour and mix until evenly combined.  Dough will be sticky. 

Scoop dough onto prepared pan, and shape into a flattened log.

Bake for 25-30 minutes.  Remove from the oven and allow to cool about 30 minutes.  Using a spray bottle with room temperature water, lightly and evenly spritz water on biscotti log.  This will make the biscotti easier to slice.  Using a serrated knife, slice biscotti into 1/2 - 3/4 inch slices.

Reduce oven temperature to 325 degrees.

Set the biscotti on edge on baking sheet and bake for 25 to 30 minutes.  They will appear dry and be starting to turn golden when they are done.  They still may be a tiny moist in the center, but they will continue to dry as they cool.  Remove from oven and transfer to rack to cool.

Store in an air container for several days. 


Monday, September 5

Mac & Cheese with Diced Ham

This is one of my go to recipes.  It's quick (yes, even as homemade, it's still a quick dinner), it's easy, and I always have the ingredients on hand to make this.  So if Leftovers night rolls around and we've already eaten up the leftovers that week, there's a good chance I'll be making some of this.  While I don't always have ham on hand, it's always a yummy addition to a wonderful comfort food. 


Mac & Cheese with Diced Ham

1 pound of pasta (I prefer the pieces {penne, elbow, shells, etc.} as opposed to noodles {spaghetti, fettuccine, etc.} but that's because I have a three year old and it means no cutting up food--you can use whatever type of pasta you like)

Boil a large pot of water and cook pasta according to package directions.  Drain pasta thoroughly when cooked. 

5 Tbsp butter
5 Tbsp flour
2 1/2 cups milk (I use whole)
2 Tbsp Dijon mustard
2 1/2 cups shredded cheese (I used a combo of sharp cheddar, Parmesan, and mozzarella this time, but what you have should work)
Salt and pepper
1 cup diced ham (if adding)

In a large saucepan, melt butter and whisk in flour.  Allow flour to cook for 1-2 minutes and whisk in milk.  As mixture starts to heat through it will start to thicken.  Whisk in mustard and shredded cheese and allow to heat for several minutes, stirring occasionally.  Add in diced ham.  Season with salt and pepper to taste.  Stir in drained pasta and mix sauce and pasta together until pasta is evenly coated.

Now, since this dish is fully ready to eat at this stage, I usually just serve the mac and cheese up.  I rarely take the extra step to bake, because 1. the dish is already ready to serve--I don't see the point in dirtying up another dish I am going to have to wash  2. yes, I am truly am that lazy.  BUT, that said, if you feel so inclined, you may.

Breadcrumb Topping 

1 slice bread, buttered

Place buttered slice of bread in food processor and pulse on high about 10-15 times or until it reaches  breadcrumb consistency.  Isn't that a nifty little trick?  If you don't have a food processor, mix about 2/3 cup prepared breadcrumbs and 2 tablespoons melted butter.

Spray a casserole dish liberally with non stick spray or coat well with butter.  Pour in mac and cheese and top with breadcrumb mixture.  Broil until top of casserole is nice and golden.  Serve and enjoy!


♥ ♥ ♥ ♥ ♥

This recipe is linked to:

Beauty and Bedlam's Tasty Tuesday
Blessed With Grace Tempt My Tummy Tuesday
Designs By Gollum Foodie Friday
Grocery Cart Challenge Recipe Swap
Friday Potluck at EKat's Kitchen
Hearth 'n Soul Recipe Swap at Premeditated Leftovers

La Bella Vita's Fresh Clean and Pure Friday 
Miz Helen's Country Cottage Full Plate Thursday


Saturday, September 3

Tried It & Loved It: Oven Fries


This one is such a great recipe and it's one I have been doing for several years now.  It's a great side to hamburgers, hot dogs--anything grilled really.  Plus, it's a healthier alternative to potato chips (a common accompaniment to grilled items) that are drenched in those unnatural vegetable oils.

And they couldn't be more simple, so there you go.

Oh, and next time I'll try to take a picture before our dinner gets devoured.  


Oven Fries ~ from Rachael Ray

Red potatoes, cut into wedges
Extra virgin olive oil
Grill seasoning (think Montreal's steak seasoning--get it at Costco, it's way cheaper.  Imagine that.)

Preheat oven to 425 degrees. 

Toss potato wedge slices in extra virgin olive oil and grill seasoning.  Layer evenly on baking sheet or baking stone.  I like the stone--makes 'em more crispy.  Bake for about 20-30 minutes or until cooked through. 

 
This recipe is linked to Life As Mom Ultimate Recipe Swap.


Monday, August 29

Limeade

So this will be the last of my lime posts.  Having just a few limes left, this is what I came up with for my final creation.  I wasn't in the mood for something big and time consuming and Peanut was wanting to go outside and swim in her little pool.  Plus, I had a new magazine that was calling my name, so time was not on my side.

This was super easy, super refreshing, and there is no sugar added!  How about them apples limes? 


Summertime Limeade

5 cups water
2/3 cup fresh squeezed lime juice
4 teaspoons Stevia powder (I get mine in a big container from Trader Joe's)

Stir all ingredients together.  Add additional Stevia if more sweetness is desired.  Enjoy!


♥ ♥ ♥ ♥ ♥

This recipe is linked to:

Beauty and Bedlam's Tasty Tuesday
Blessed With Grace Tempt My Tummy Tuesday
Designs By Gollum Foodie Friday
Grocery Cart Challenge Recipe Swap
Friday Potluck at EKat's Kitchen
Hearth 'n Soul Recipe Swap at Premeditated Leftovers

La Bella Vita's Fresh Clean and Pure Friday 
Miz Helen's Country Cottage Full Plate Thursday


LinkWithin

Related Posts with Thumbnails